PHP 支付接入:用 cURL 下單,並驗證 Webhook 簽名
一步步完成 PHP 支付網關接入:用 cURL 創建訂單、跳轉收銀台、用 hash_equals 驗證 Webhook,並且只履約一次。
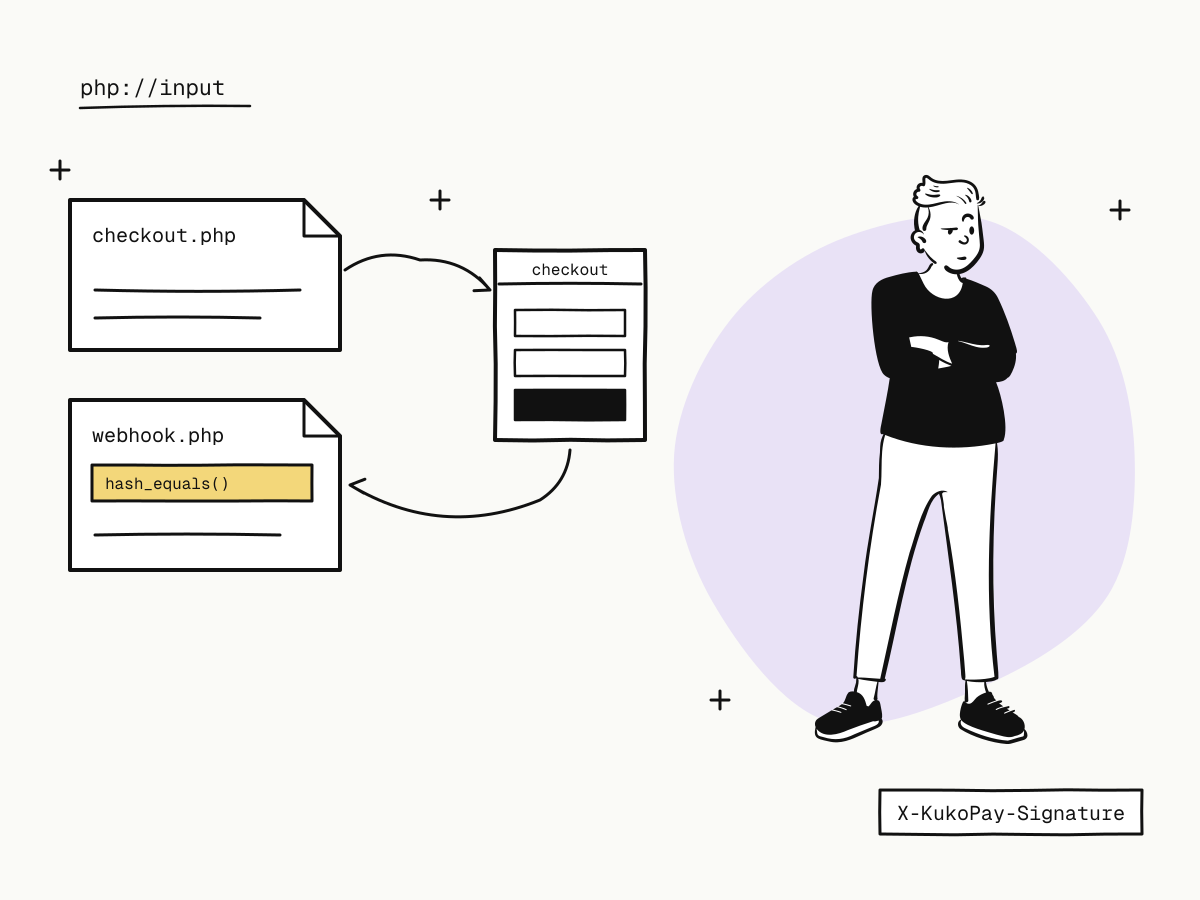
PHP 支付網關接入不需要框架,也不需要 SDK。兩個腳本就夠了:checkout.php 創建訂單並把買家重定向到託管收銀台,webhook.php 接收支付成功的簽名通知。銀行卡信息在託管頁面上填寫,永遠不會經過你的服務器。
這篇教程用純 PHP 和 cURL 搭建 KukoPay 的 PHP 支付接入——創建訂單、用 hash_equals 驗證 Webhook 簽名、只履約一次、在沙箱裏測試——並順帶給出 Laravel 的寫法。
開始之前:你真的需要寫代碼嗎?
如果你用的是現成的系統而不是自己寫的代碼,先確認一下:
- 有易支付設置的系統——V2Board、SSPanel、獨角數卡——填三個值就能接入,不用寫代碼。見 V2Board 支付網關。
- Xboard 有現成的插件,見 Xboard 支付插件。
- 根本沒有系統? 收款鏈接不需要任何代碼,見 收款鏈接是什麼。
否則請繼續往下看。你需要帶 cURL 擴展的 PHP 8、在 開發者 → API 密鑰 取得的沙箱 API 密鑰(kuko_test_…)和應用的回調簽名密鑰,以及一個能訪問到 webhook.php 的公網 HTTPS 地址。
第一步:checkout.php——創建訂單
<?php
$order = create_local_order($_POST['product']);       // 你自己的訂單,帶價格

$payload = [
    'out_trade_no' => $order['id'],
    'amount'       => $order['amount_cents'],         // 以分為單位的整數:2990 = $29.90
    'currency'     => 'USD',
    'subject'      => $order['title'],
    'notify_url'   => 'https://shop.example.com/webhook.php',
    'return_url'   => 'https://shop.example.com/orders/{OUT_TRADE_NO}/complete',
];

$ch = curl_init('https://api.kukopay.com/v1/orders');
curl_setopt_array($ch, [
    CURLOPT_POST           => true,
    CURLOPT_RETURNTRANSFER => true,
    CURLOPT_TIMEOUT        => 15,
    CURLOPT_HTTPHEADER     => [
        'Content-Type: application/json',
        'X-Api-Key: ' . getenv('KUKOPAY_API_KEY'),
        'Idempotency-Key: create-' . $order['id'],
    ],
    CURLOPT_POSTFIELDS     => json_encode($payload),
]);
$response = json_decode(curl_exec($ch), true);
$status   = curl_getinfo($ch, CURLINFO_RESPONSE_CODE);
curl_close($ch);

if ($status >= 300) {
    error_log('create order failed: ' . ($response['error'] ?? '?') . ' request_id=' . ($response['request_id'] ?? '?'));
    http_response_code(502);
    exit('Checkout is unavailable, please try again.');
}

header('Location: ' . $response['data']['checkout_url'], true, 303);
要點:
out_trade_no就是你的訂單 id,重複請求會返回同一張訂單,見 冪等鍵是什麼。amount是服務器算出的、以分為單位的int。 永遠不要傳29.9這樣的浮點數,也不要用表單裏提交的價格,見 支付接口為什麼用「分」傳金額。- API 密鑰來自環境變量,不寫在代碼或倉庫裏,見 API 密鑰能放在前端嗎。
第二步:webhook.php——驗證簽名
<?php
function kukopay_verify(string $raw, string $header, string $secret): bool
{
    $t = null; $sigs = [];
    foreach (explode(',', $header) as $item) {
        [$k, $v] = array_pad(explode('=', trim($item), 2), 2, null);
        if ($k === 't')  { $t = $v; }
        if ($k === 'v1') { $sigs[] = $v; }
    }
    if ($t === null || !$sigs || abs(time() - (int) $t) > 300) {
        return false;
    }
    $expected = hash_hmac('sha256', $t . '.' . $raw, $secret);
    foreach ($sigs as $sig) {
        if (hash_equals($expected, $sig)) { return true; }
    }
    return false;
}

$raw    = file_get_contents('php://input');           // 原始請求體,與發送時完全一致
$header = $_SERVER['HTTP_X_KUKOPAY_SIGNATURE'] ?? '';

if (!kukopay_verify($raw, $header, getenv('KUKOPAY_WEBHOOK_SECRET'))) {
    http_response_code(400);
    exit;
}

$event = json_decode($raw, true);
if (empty($event['test'])) {                         // 測試回調:只確認收到
    handle_event($event);
}
http_response_code(200);
讀取 php://input,而不是 $_POST 或重新編碼過的數組,並用 hash_equals 比較,保證比較時間恆定。保留所有 v1 值:密鑰輪換期間會有兩個。見 Webhook 驗簽怎麼做。
第三步:只履約一次
function handle_event(array $event): void
{
    $pdo = db();
    $pdo->beginTransaction();
    $stmt = $pdo->prepare('INSERT IGNORE INTO kukopay_events (id) VALUES (?)');   // id 為主鍵
    $stmt->execute([$event['id']]);
    if ($stmt->rowCount() === 0) { $pdo->commit(); return; }                     // 已經處理過

    if ($event['type'] === 'payment.succeeded') {
        $o = $event['data']['object'];
        mark_order_paid($pdo, $o['out_trade_no'], $o['trade_no'], $o['amount']);
        queue_fulfilment($pdo, $o['out_trade_no']);
    }
    $pdo->commit();
}
事件 id 和訂單更新在同一個事務裏,重試的 Webhook 就不會發兩次貨。10 秒內返回,耗時工作交給隊列。見 支付回調冪等處理。
在 Laravel 裏怎麼寫
同樣的兩部分可以直接對應到 Laravel:
- 創建訂單:
Http::withHeaders([...])->post('https://api.kukopay.com/v1/orders', $payload),然後return redirect()->away($checkoutUrl);。 - Webhook 路由: 用
$request->getContent()讀取原始請求體,用$request->header('X-KukoPay-Signature')讀取簽名,並把這個路由排除在 CSRF 校驗之外——簽名承擔了這項工作。 - 去重: 事件 id 上建唯一索引,用
DB::transaction()包住插入和訂單更新。
第四步:在沙箱裏測試
- 運行
checkout.php,用4242 4242 4242 4242(有效期任意未來日期、安全碼任意)付款,再用4000 0000 0000 0002試一次被拒,見 支付測試卡號大全。 - 讓
webhook.php故意返回一次500,確認重試被正確去重。 - 如果驗簽失敗,用控制台的發送測試回調和驗簽自檢排查,見 如何在本地測試 Webhook。
上線只需把沙箱密鑰和簽名密鑰換成同一個應用在正式環境的值。其他語言的寫法:Node.js、Python。
總結
- PHP 支付網關接入需要兩個腳本:一個創建訂單並跳轉
checkout_url,一個接收 Webhook; - 用 cURL 創建訂單,以你的訂單 id 作為
out_trade_no,傳整數金額和Idempotency-Key; - 對
php://input用hash_equals驗證X-KukoPay-Signature,任意一個v1匹配即可; - 在同一個事務裏記錄事件 id 並履約,對測試回調只確認不處理;
- 有易支付設置的系統或 Xboard 插件,完全不需要寫代碼。
在沙箱裏把它跑通
註冊商戶後即可申請測試密鑰,不需要等待資質審核。