Accept payments in a mobile app: hosted checkout, return links and confirming the result
How to accept payments in a mobile app: create the order on your server, open the hosted checkout, return with a universal link, and confirm on the webhook.
On this page
To accept payments in a mobile app without building a payment form, open a hosted checkout from the app and bring the user back when they have paid. The app never sees card details, Apple Pay, Google Pay and wallets work as they do on the web, and the same backend serves your website and your app. What needs care is the part around it: where the order is created, how the user returns to the app, and how the app learns that the payment really went through.
This guide explains how to accept payments in a mobile app with KukoPay's hosted checkout: the flow, opening the checkout, returning to the app with a universal link or App Link, confirming the result, and the platform rules to check first.
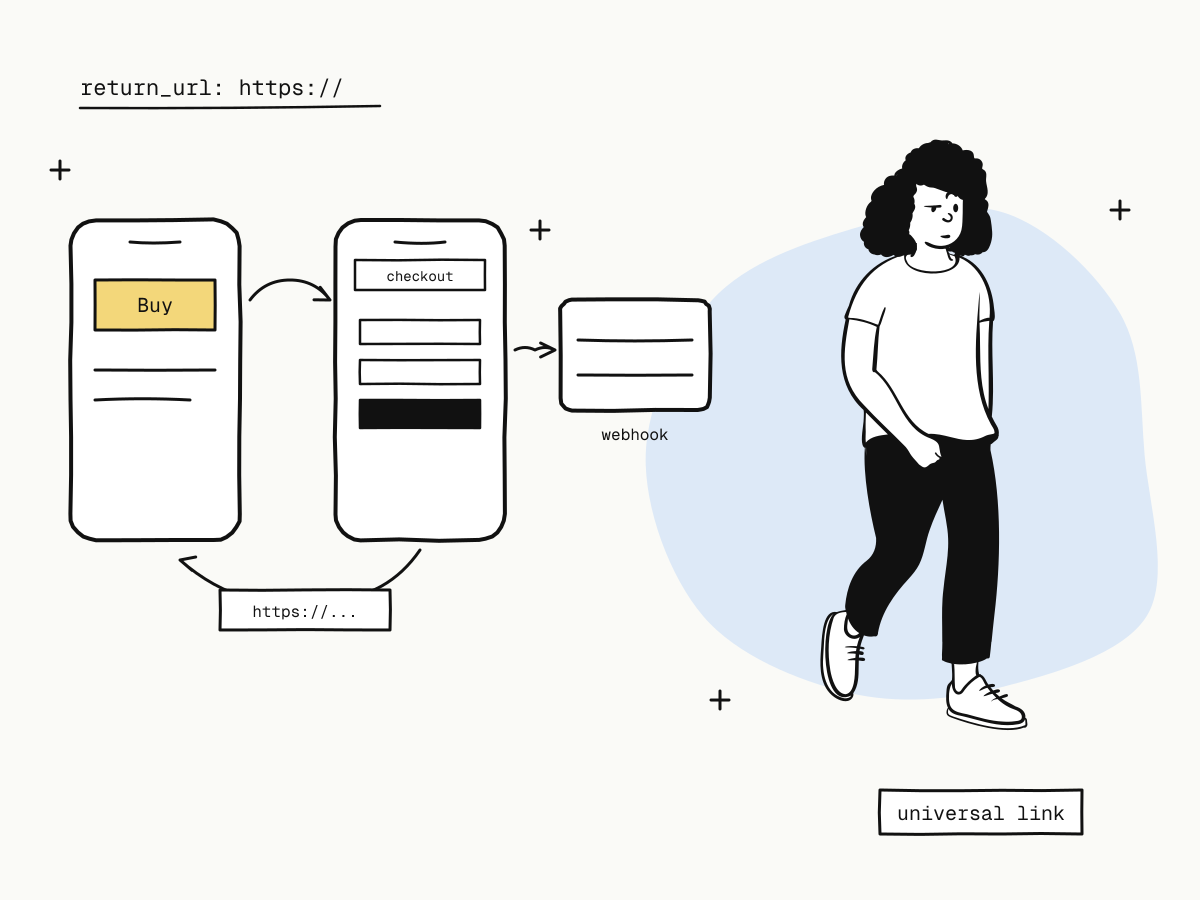
The mobile payment flow
- The app asks your backend to start checkout for something the user chose.
- Your backend creates the order with
POST /v1/orders— your order id asout_trade_no, the amount from your own catalogue — and returns thecheckout_url. - The app opens the
checkout_urlin an in-app browser sheet or the system browser. - The user pays on the hosted checkout.
- The checkout returns the user to your
return_url, which opens the app. - Your backend learns the result from the
payment.succeededwebhook; the app asks your backend for the order's state and updates its screen.
The API key never ships in the app: an app package can be unpacked, and a key inside it is public. See API key in frontend code.
Opening the checkout
- iOS: an
SFSafariViewControllerorASWebAuthenticationSessionkeeps the user inside the app while showing a full browser, with the address bar visible. - Android: a Custom Tab does the same.
- Avoid a bare embedded WebView for payments where you can: wallets and bank authentication pages often expect a real browser, and users cannot see which site they are typing into.
Open the checkout_url as it was returned. It carries a short-lived token for that one order, so do not log it or pass it through analytics — see what is a hosted payment page.
Returning to the app: use https links, not a custom scheme
After payment the checkout shows the receipt and sends the user to the order's return_url about 5 seconds later (or at once if they tap to return). KukoPay accepts only http(s) return URLs, and in live mode only public HTTPS — so a custom scheme such as myapp://paid is refused. Use the platform's verified web links instead:
- iOS universal links and Android App Links — an
https://address on your own domain that the operating system opens in your app when it is installed, and in the browser when it is not.
{
  "return_url": "https://shop.example.com/app/orders/{OUT_TRADE_NO}/complete"
}
{OUT_TRADE_NO} is replaced with your order number, so the app knows which order came back. If the app is not installed, or the link does not open it, the same address should serve a web page that says what happened — see payment success page.
Confirming the payment in the app
Returning to the app is not proof of payment — the user may close the browser instead, or come back before the result is known. So:
- Fulfil on your backend from the webhook, not in the app — see payment webhook idempotency.
- When the app comes back to the foreground (with or without the return link), ask your backend for the order's status, and show paid, confirming or not paid accordingly. Your backend answers from its own records or from
GET /v1/orders/{out_trade_no}. - Poll briefly while "confirming", then fall back to a push notification or an in-app message when the webhook arrives.
Platform rules to check first
App stores have their own rules about how apps may sell digital goods and services consumed inside the app, and those rules can require the store's own in-app purchase system for some products and some regions. Physical goods and real-world services are generally treated differently. Check the current Apple App Store and Google Play policies for what you sell before choosing a web checkout in your app. KukoPay's own rules on what can be sold apply as well — see prohibited businesses and payment gateway for digital products.
Testing mobile payments
- Use sandbox keys on your backend: the app does not change between sandbox and live.
- Pay with the test card
4242 4242 4242 4242, and test wallets through their sandbox approval page — see test credit card numbers. - Test the unhappy paths on a real device: close the browser mid-payment, put the app in the background, uninstall it and open the return link.
Summary
- To accept payments in a mobile app, create the order on your backend and open the hosted
checkout_urlfrom the app — no key and no card form in the app; - open it in an in-app browser sheet (
SFSafariViewController, Custom Tabs) rather than a bare WebView; - return with an
https://universal link or App Link — custom schemes are not accepted, and live return URLs must be public HTTPS; - confirm on the backend from the webhook, and have the app ask the backend for the order's status when it returns;
- check the app stores' rules for digital goods before you choose a web checkout.
Try it in the sandbox
Create a merchant account and request a test key. The sandbox needs no business verification.