Payment gateway integration: 4 ways to connect your website, from no-code to full API
Payment gateway integration options compared: plugins, epay gateways, payment links and the API — what each needs, what it does, and how to choose.
On this page
Payment gateway integration is how your website hands a buyer over to a payment provider and learns that they paid. It does not have to mean weeks of development: depending on your system, it can be a plugin you configure in minutes, a link you paste into a page, or an API you call from your server. All of them can end at the same checkout.
This guide compares four ways to integrate a payment gateway with KukoPay — a ready-made plugin, the epay-compatible gateway, payment links and the direct API — what each needs from you, what it can do, and the rules that apply whichever you choose.
Four ways to integrate, compared
| Way | Best for | Development | What you get |
|---|---|---|---|
| Ready-made plugin | Systems with an official plugin, such as Xboard | None — fill in a few settings | Orders, checkout, payment notifications |
| Epay-compatible gateway | Systems that already speak the epay (易支付) protocol: V2Board, SSPanel, Dujiaoshuka | None — enter gateway URL, merchant ID and key | Orders, checkout, success notification, order lookup |
| Payment links | Fixed-price products or services, invoices, donations — no order system needed | None — create a link in the dashboard | Checkout, notifications, a payment-count limit |
| Direct API | Your own system, or when you need refunds, reconciliation and disputes in code | Server-side development | Every endpoint |
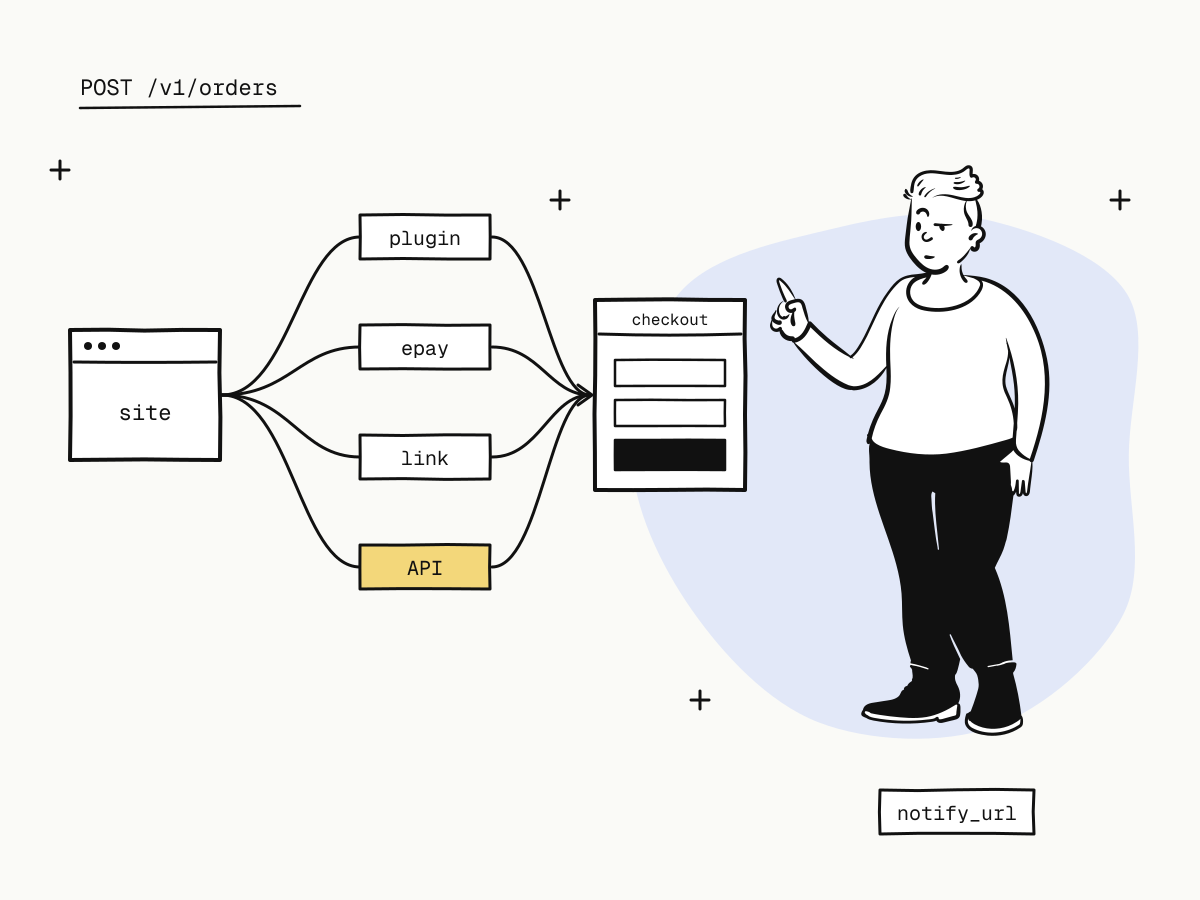
Underneath, every route uses the same server API, the same hosted checkout and the same signed notifications. The difference is only who writes the code.
Option 1: a ready-made plugin
If your platform has an official plugin, it is the shortest path: upload it in your platform's admin, enter an API key and the webhook signing secret, and the plugin handles the main flow — create the order, send the buyer to checkout, fulfil on the notification.
KukoPay's plugins are built from source published with the docs and downloaded from kukopay.com/downloads, each version with a SHA-256 checksum so you can verify what you install. Refunds, dispute evidence and payouts are done in the merchant dashboard, so the plugin does not need to support them.
Option 2: an epay-compatible gateway
Many self-hosted storefronts and panels already support the epay protocol. If yours does, you do not need a plugin at all: enter KukoPay's gateway URL (https://api.kukopay.com/epay), your merchant ID (pid) and key, and payments work. Each epay order carries its own notification URL. The signature rules, notification behaviour and the order-timeout pitfall are in the epay integration guide.
Option 3: payment links
No platform and no code? Create a payment link in the dashboard — a fixed-price URL that opens the checkout — and put it behind a "Buy" button, in an email or in a chat. Every visit becomes its own order, with notifications like any other. It is the fastest way to start, and many merchants keep using links for invoices and one-off sales after integrating the API.
Option 4: the direct API
For your own system, the API gives you everything: create orders, look them up, refund, read the ledger, handle disputes. A basic integration needs just two pieces:
- Create an order and redirect the buyer to its
checkout_url:
curl -X POST "https://api.kukopay.com/v1/orders" \
  -H "Content-Type: application/json" \
  -H "X-Api-Key: $KUKOPAY_API_KEY" \
  -d '{
    "out_trade_no": "ORD_20261108_0001",
    "amount": 2990,
    "currency": "USD",
    "notify_url": "https://shop.example.com/webhooks/kukopay",
    "return_url": "https://shop.example.com/orders/{OUT_TRADE_NO}/complete"
}'- Verify the webhook and fulfil on
payment.succeeded.
The checkout itself is hosted, so card details never reach your server — see what is a hosted payment page. The quickstart walks through it; from there, add retries with idempotency keys (what is an idempotency key) and error handling (payment API error handling).
How to choose
- Your platform has a plugin → use it.
- Your platform supports epay → use the epay-compatible gateway.
- You sell a few fixed-price things, or want to start today → payment links.
- You run your own system, or need refunds and reconciliation automated → the API.
You can mix them: one account can run a plugin on one site, the API on another and payment links for invoices, each as its own app with its own keys — see accepting payments on multiple websites.
Rules that apply to every integration
- Fulfil on the notification or an order lookup, never on the buyer returning to your site — see return_url vs notify_url.
- Live payments need somewhere to notify. Either each order carries a public HTTPS
notify_url, or the app has a webhook endpoint subscribed topayment.succeeded; otherwise live orders are refused. Epay orders carry their own notification URL, so this does not apply to them. - One app per system. Each system gets its own keys, order numbers and notifications; the money stays in one account.
- Keep test and live credentials apart. The API key prefix (
kuko_test_/kuko_live_) — or for epay, thepid— decides the environment, and the signing secrets differ too. See sandbox vs live mode.
Try it before you choose
Every route works in the sandbox without waiting for business verification. Integrate first, test success, declines and webhooks, then switch to live keys — test credit card numbers lists the scenarios.
Summary
- Payment gateway integration can be a plugin, an epay-compatible gateway, payment links or the direct API — all ending at the same hosted checkout;
- plugins and epay need no code, payment links need no system, the API gives full control;
- choose by your platform and how much you need to automate, and mix routes across apps if you like;
- whichever you pick, fulfil on notifications, give live orders somewhere to notify, and keep test and live credentials apart.
Try it in the sandbox
Create a merchant account and request a test key. The sandbox needs no business verification.